|
This is a very brief manual for itsagif.
Although the screenshots are from itsagif running on System 8, this manual explains how to use itsagif on System 6, 7, 8, and 9.
The program begins with a splash screen. You can dismiss the
splash screen by pressing a key or button; itsagif then asks
for a PICT file to open. As an example, we'll
open the “Small Frog” file,
which contains an image of a small frog.
The “Small Frog” image is in the public domain, and was graciously
placed on the web by Public Domain Images.
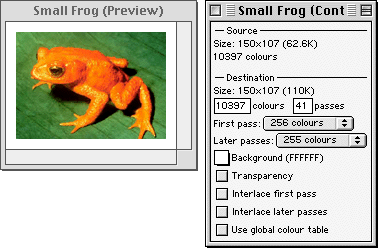
As you can see, itsagif displays an image preview
on the left and a control window on the right.
We will now go over each element of the control window, from top to bottom.
Source Controls
The source controls display information about the source image.
- Size: 150x107 (62.6K)
-
This control displays the size of the original image. Our example image is
150 pixels wide and 107 pixels high. When placing the GIF file in some HTML
the size should be included. For our example, the appropriate HTML would be
<img src=“Small Frog.gif” width=150 height=107>.
The memory requirements are listed after the image dimensions.
The small frog image uses 62.6K when stored as a 24-bit image without any compression.
- 10397 colours
-
This control displays the number of colours present in the original image;
our example image has 10397 distinct colours.
Destination Controls
The destination controls determine how the image is converted into a GIF image.
- Size: 150x107 (110K)
-
This control displays the size of the produced image; the dimensions of the
produced image match those of the original image. However, the produced image
will be a 110K GIF file. The GIF file will be identical to the preview image if
you are previewing the image with a 24-bit video card. If you are previewing
the image with a
1,2,4,8, or 16-bit
video card the produced GIF file will
be as good or better than the preview image.
The remaining destination controls impact the quality and memory
requirements of the produced GIF file. After changing any of the controls,
itsagif will automatically recompute the preview image and memory
requirements. While computing the memory requirements itsagif may display
lower estimates of the size (for example
“>36K”...“>44K”...“>60K”...“110K”).
- 10397 colours
-
This control displays the number of colours used in the produced image.
You may specify the number of colours by entering a value into this control.
Using fewer colours will usually reduce the size of the produced GIF file.
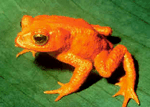
Here is the small frog image, rendered using 256 colours:
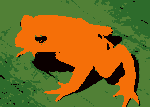
Using 4 colours, the small frog image appears as follows:
- 41 passes
-
This control displays the number of passes needed to render the image. Each
pass can paint at most 256 colours. You may specify the number of passes by
entering a value into this control. Using fewer passes will usually reduce the
size of the produced GIF file.
- First pass: 256 colours
-
This control displays the number of colours used to paint the first pass.
Using a small number of colours on the first pass allows viewers to get a
quick preview of image. To see what the image will look like after the first
pass, set this control as desired and subsequently specify that one pass is to
be used to render the image (using the # of passes control described above).
You will also see the memory size of the first pass; 14,400 baud modems
transfer approximately 1K per second.
- Later passes: 255 colours
-
This control displays the number of colours used to paint all passes after
the first pass.
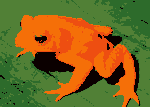
With 2 colours on the first pass, and 1 colour on later passes,
the image would appear as follows:
| 1 pass |
2 passes |
3 passes |
4 passes |
 |
 |
 |
 |
| 2 colours |
3 colours |
4 colours |
5 colours |
| 602 bytes |
1.1K |
1.9K |
2.6K |
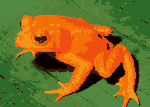
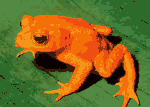
Using 3 colours on later passes, but still 2 colours on the first pass,
the image would appear as follows:
| 1 pass |
2 passes |
3 passes |
4 passes |
 |
 |
 |
 |
| 2 colours |
5 colours |
8 colours |
11 colours |
| 602 bytes |
2.2K |
3.9K |
5.4K |
Although the example image renderings only use a few colours
per pass (for clarity), the general trends illustrated hold for
more colourful renderings.
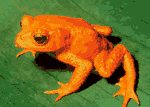
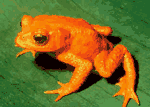
The next rendering example uses 4 colours on the first
pass and 7 colours on later passes. Notice that only four passes
are needed for a reasonable reproduction of the original image.
| 1 pass |
2 passes |
3 passes |
4 passes |
 |
 |
 |
 |
| 4 colours |
11 colours |
18 colours |
25 colours |
| 1.4K |
4.6K |
7.2K |
9.2K |
- Background (FFFFFF)
-
This control displays a small swatch of colour that represents the image's
intended background colour along with the HTML description of that colour.
Clicking on the colour allows you to choose a new colour; option-clicking
gives you finer control over the colour chosen. Our example image has a
white background (the default) which is specified in HTML as
bgcolor=#FFFFFF in the body tag, as follows:
<body bgcolor=#FFFFFF>.
Itsagif will display the background colour around the preview image as
well as over portions of the image that have been marked as transparent.
- Transparency
-
When this control is checked, portions of the image are transparent.
- To
specify a transparent colour, move the pointer over the desired colour on
the preview image and click once.
-
Click over other colours to specify multiple transparency colours.
-
Clicking over a transparent region causes
the underlying colour to become opaque again.
-
The delete key removes
the most recently added transparency colour.
Unchecking this control will disable transparency.
- Interlace first pass
-
When this control is checked, the first pass of the image will be stored
in an interlaced manner. Interlacing the first pass allows viewers to
get a very quick idea of what the image will look like as it is being
downloaded. Interlacing usually increases the memory size, although only
slightly.
- Interlace later passes
-
When this control is checked, all passes after the first pass are
interlaced. Most browsers will present the image to the viewer in less
time if later passes are not interlaced.
- Use global colour table
-
When this control is checked, a single colour table is used for all
passes instead of one colour table per pass. Images with a global
colour table are compatible wuth more (older) browsers and utilities.
Multiple passes may still be used to provide sharp previews.
Optional Windows
There are several optional windows that may be opened
via the “Windows” menu.
- Quality vs Number of Colours
-
This window displays the quality (faithfulness of the
new image to the
original image) as a function of the number of colours
used. The quality is computed by going over every pixel in
the new image and comparing it to the corresponding pixel
in the original image. 100% quality ensures that there is
no loss - the new image is identical to the original image.
If the original image
was pure white and the new image pure black (or vice-versa)
the new image would have 0% quality.
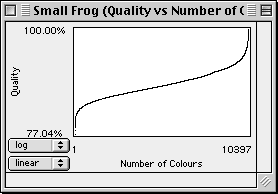
The quality scale defaults to a logarithmetic scale while
the number of colours defaults to a linear scale. You can
override this by using the controls in the lower left corner of
the window. You can use the cursor keys or the mouse to
select points on the curve. Itsagif will display the
quality for the selected number of colours.

Press the space bar or mouse button to preview the image
at the selected number of colours.
- Maximum Error vs Number of Colours
-
This window displays the maximum error between
the new and original images. The maximum error is
given by the pixel from the new image that deviates
the most from the corresponding pixel in the original
image. An error of 100% indicates a black pixel representing
a white pixel (or vice-versa) while an error of 0% indicates
the pixels are identical.

As with the “Quality vs Number of Colours” window,
the mouse and keyboard may be used to explore
the trade-offs between image quality and the
number of colours used.
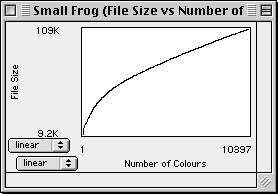
- File Size vs Number of Colours
-
This windows displays the size of the produced GIF file
as a function of the number of colours used.
Clipboard Support
You can import images from other programs via the clipboard.
After copying (or cutting) an image to the clipboard from another program,
return to itsagif and select “New Picture from Clipboard”
under the “Edit” menu.
Be warned that itsagif requires a lot of memory for larger continuous-tone
images, as it keeps both the original and preview image in memory at 24-bits.
Furthermore, additional structures are used to maintain exact knowledge about
every colour in the image. Large continuous-tone images take a long time to
load, as these structures are built up as the image is loaded. The algorithms
may be improved in the future, if there is enough demand - the program was
written mainly out of interest and to demonstrate that GIF files can contain
more than 256 colours.
Many thanks to Harold Poskanzer
for kindly providing the
textures
used in the itsagif splash screen and web site.
|


